7 Best Ways to Set Up Motion Zones for Doorbell Cameras?

Time:2026-09-20 Author:Liam
0%

A doorbell camera can protect an entrance, but its alerts are only useful when motion zones match real activity. A poorly adjusted zone may capture every passing car, waving tree, or afternoon shadow. It may also miss a visitor standing at the edge of the porch.

So, how do you answer the question, “How to set up motion zones for a doorbell camera?” The process begins with observing your doorway at different times. Notice where guests pause, where packages are placed, and where pedestrians cross the camera’s view. Then, shape the detection area around those places instead of covering the entire screen.

Bruce Schneier, a respected security technologist and author, said, “Security is a process, not a product.” That principle fits smart camera setup well. Motion zones need regular review after installation, especially when seasons change or furniture moves. A zone that works in bright summer light may react differently to long winter shadows.

This guide explores seven practical ways to improve motion zones. It covers porch boundaries, sidewalk exclusion, vehicle traffic, detection distance, package areas, sensitivity controls, and real-world testing. Small adjustments matter. Move the boundary slightly. Watch the results. Repeat when needed.

Perfect settings are unlikely.

A reliable setup reduces unnecessary alerts without hiding important movement. It should help you notice a genuine visitor while ignoring routine background activity. The best configuration is not the widest one. It is the one built from your doorway’s actual conditions, tested patiently, and refined with evidence.
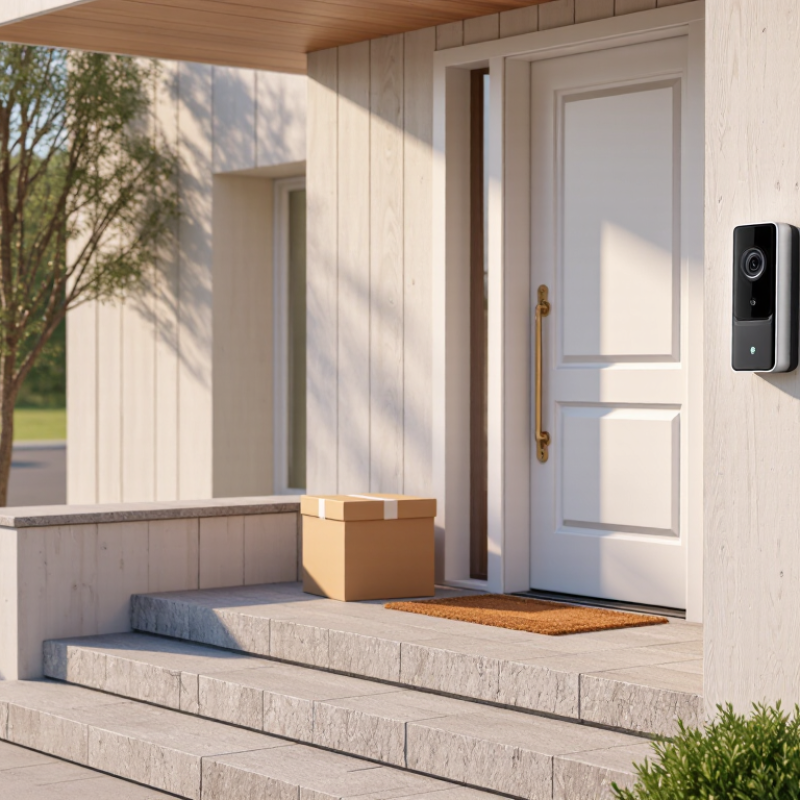
7 Best Ways to Set Up Motion Zones for Doorbell Cameras?

Understand How Motion Zones Work on Doorbell Cameras

Motion zones define which parts of a camera’s view can trigger alerts. They do not improve every detection equally. Most doorbell cameras combine pixel change with infrared or image-based analysis. A moving tree may create pixels. A person crossing the walkway creates a stronger event.

Start with a narrow zone covering the path, porch, and package area. Exclude roads, sidewalks, windows, and swaying plants. Keep the zone about 1–2 meters from the doorway when possible. This reduces unnecessary notifications without hiding genuine visitors. Use separate zones for people, vehicles, and general movement if your camera supports them. Set higher sensitivity during daylight, then test it after dark. Shadows behave differently.

The FBI Crime Data Explorer recorded 847,522 burglary offenses in 2022, showing why useful alerts matter. NIST’s guidance on trustworthy systems also stresses testing performance in real operating conditions, not only during installation. Review ten daytime events and ten nighttime events. Note missed faces, false alerts, and delayed notifications. Adjust one setting at a time. This is slower, but clearer.

Rain can blur boundaries. Headlights can overwhelm them. A practical setup may need seasonal changes. I once assumed a tight zone was always better; it missed a visitor approaching from the side. That mistake matters. Leave a small buffer near the entry, and avoid aiming directly at reflective surfaces. Motion zones are filters, not guarantees. Schedule quiet hours for predictable activity, then inspect the event history weekly.

Choose the Right Areas to Monitor Around Your Door

7 Best Ways to Set Up Motion Zones for Doorbell Cameras

Choose the Right Areas to Monitor Around Your Door

A useful motion zone begins with the visitor’s approach, not the entire image. Cover the walkway, front steps, porch floor, and the space beside the door. Include the package drop area. Keep the zone narrow enough to ignore passing traffic.

The FBI Crime Data Explorer recorded more than 800,000 reported burglary offenses in the United States during 2023. The Bureau of Justice Statistics also reported about 98 property-crime victimizations per 1,000 households that year. These figures support focused monitoring around entry points, but they do not justify watching everything nearby. A camera facing the street can create constant alerts from cars, cyclists, and pedestrians. That becomes noise.

Aim one zone at the lower approach. Aim another at the door’s reach area. Add the driveway or side gate only when they lead directly toward the entrance. Exclude swaying branches, reflective windows, and neighboring property. Night lighting can change the scene dramatically. Test the camera during rain and darkness. My first setup covered too much sidewalk, and useful alerts disappeared among harmless movement. I still adjust it seasonally. Local privacy expectations also matter, so avoid recording private windows or areas beyond your property.

Exclude Streets, Sidewalks, and Other Unwanted Activity

7 Best Ways to Set Up Motion Zones for Doorbell Cameras?

Exclude Streets, Sidewalks, and Other Unwanted Activity

A useful motion zone starts with the camera’s view, not the app’s default settings. Draw a tight polygon around your porch, gate, and driveway. Leave out the road and public sidewalk whenever the controls allow it. Lower sensitivity near tree branches, flags, and reflective windows. These small changes often remove most false alerts.

Use activity schedules to mute predictable traffic during busy hours. At night, narrow the zone again because headlights can trigger distant detection. Choose human-only filtering when available, but treat it as an assistant, not proof. A passing cyclist may still appear as a person. Keep the camera angled downward, with the horizon near the upper third of the frame. This reduces street movement without hiding the entry path.

Test each change from several positions: the curb, steps, and doorway. Test it twice. Review a full day of clips before adjusting anything else.

I once tightened a zone too far and missed a visitor near the side gate. Not always. That mistake showed why maximum restriction is not always the safest setting.

Check zones after seasonal changes, furniture moves, or new lighting. Keep alerts focused on meaningful areas, while accepting a little noise when visibility matters.

Adjust Zone Size, Sensitivity, and Detection Distance

Motion zones work best when they match real movement around your door, not the entire camera view. In my experience, trimming the zone to the walkway reduces alerts from passing cars, tree shadows, and neighbors. Keep it practical. Exclude roads, public paths, windows, and moving branches when the camera allows privacy masking.

Adjust the zone size before increasing sensitivity. A smaller zone often produces cleaner notifications. Set sensitivity low, then raise it gradually until a person is detected reliably. Test after dark. Infrared glare, porch lights, rain, and insects can change performance. Detection distance also needs care; a range that reaches too far may capture distant pedestrians, while a short range can miss visitors near the gate. Walk through the area at different distances and review the recorded clips.

Use separate zones for the doorstep and approach path when available. Give the entrance higher sensitivity and the outer area a lighter setting. Check the camera after moving furniture, adding decorations, or changing lighting. These details can alter detection results. I once ignored a hanging plant because it moved only slightly, yet wind created repeated alerts overnight. That setup was poor, and the mistake was easy to miss. Review a full day of events, not just one successful test. Motion algorithms are useful, but they are not perfect. Small changes matter. Recheck settings every season.

Test and Fine-Tune Motion Zones for Reliable Alerts

Motion zones work best when tested against real movement, not a setup screen. I begin by viewing the doorway, sidewalk, driveway, and street edge. Mark areas that genuinely matter. Keep zones away from swaying branches, reflective windows, and busy roads. A narrow zone often produces better alerts than a wide rectangle. Test it deliberately. Walk across each boundary at different speeds. Pause near the door. Carry a box. These actions reveal blind spots that static previews can hide.

I test alerts during daylight, dusk, and darkness because shadows change detection behavior. Rain, headlights, insects, and moving foliage deserve separate checks. Ask another person to approach from each side while you monitor alert timing. Record where detection starts and where it fails.

If alerts arrive late, expand the entry edge slightly or reduce the trigger distance. If alerts arrive constantly, shrink the zone before lowering sensitivity. That order preserves useful events. I once blamed poor detection on the camera, but a pale wall reflected evening light into the zone. Small environmental changes matter.

Fine-tuning should happen over several days, not during one convenient test. Review timestamps and compare alerts with actual movement. Remove repeated false triggers, then retest the same path. Keep notes about weather, lighting, and adjustments. Do not change several settings at once. Otherwise, you cannot identify the helpful change. Check zones after landscaping or furniture changes. A setting that worked in spring may fail when shadows lengthen. Recheck the boundary after every physical change.

FAQS

What is a motion zone on a doorbell camera?

A motion zone is a selected area that can trigger alerts. It acts like a filter, not a guarantee.

Which areas should a motion zone include?

Cover the walkway, porch, doorway, and package area. Keep the zone about one to two meters from the entrance.

Which areas should be excluded?

Exclude roads, sidewalks, windows, swaying plants, and reflective surfaces. They can create repeated false alerts.

Should I use one large zone?

Usually, a narrow zone works better. A wide rectangle may capture passing cars, branches, and changing shadows.

How can I test a motion zone properly?

Walk across each boundary at different speeds. Pause near the door and carry a box.

Should motion zones be tested at night?

Yes. Test during daylight, dusk, and darkness. Shadows and headlights can change detection behavior.

What should I do when alerts arrive too often?

Shrink the zone before lowering sensitivity. Remove roads, bright windows, and moving foliage first.

What should I do when alerts arrive late?

Expand the entry edge slightly or reduce the trigger distance. Keep a small buffer near the doorway.

How often should motion zones be reviewed?

Review event history weekly and retest after landscaping or furniture changes. Seasonal shadows can alter performance.

Conclusion

Setting up effective motion zones is essential for getting useful doorbell camera alerts without being overwhelmed by unnecessary notifications. If you are wondering, “How to set up motion zones for a doorbell camera?”, begin by learning how the camera identifies movement within selected areas. Focus on spaces that matter most, such as the doorway, porch, steps, or entry path, while avoiding locations that create frequent activity unrelated to visitors.

Exclude streets, sidewalks, trees, and other busy background areas whenever possible. Then adjust the zone’s size, motion sensitivity, and detection distance to match your property and daily surroundings. A smaller, focused zone may improve accuracy, while a wider zone can help cover larger entrances. After saving the settings, test them at different times and from several directions. Fine-tune the boundaries and sensitivity based on the alerts you receive so the camera can reliably detect meaningful activity while reducing unwanted notifications.

Liam

Liam

Liam is a dedicated marketing professional with a profound expertise in the industry, where he excels at highlighting the unique advantages of our core products. With a keen understanding of market trends and consumer needs, Liam frequently updates our company’s professional blog, providing......